Thursday, 14 May 2009
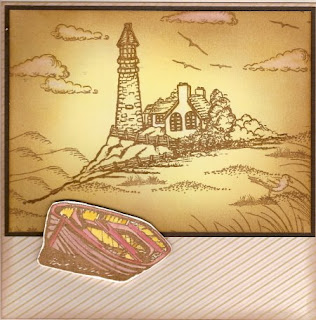
Create a Scene 1 workshop
Make & Take Fri 8th May
The tag is made by sponging white card with 3 different colours of Adirondack ink then stamp using the same colours, layer on to a background piece of card and trim. Cut a triangle of stripy paper and rip along the long edge then attach a piece of purple card to this ripped edge, trim a little at a time so it fits card base then use the small trimmings as a border.

Labels:
Elusive Images,
flower,
friday Make and Take,
purple
Make & Take Fri 1st May
The back ground on this card is made by using bleach and cling film, place a piece of kitchen towel in a shallow dish and pour on the bleach , just enough to wet the towel, now dab with the crumpled up cling film and stroke gently on your card, dont over do it or you will just bleach the whole card to one colour, I used Bazzill card and found that it bleaches nicely. Make sure that it is dry by going over with a heat gun, now stamp the flowers using black Versafine and emboss with clear powder. Wrap ribbon around card near the bottom and attach to a card base then add flowers and a greeting.

Labels:
birthday,
bleach,
Elusive Images,
flower,
friday Make and Take
Make & Take Fri 24th April
Back ground is vellum stamped with white Brilliance ink, then wrap the vellum around the black card. Stamp cups using black Versafine and emboss with clear powder. Trim cups and layer on to black card place in centre of base card, stamp a greeting, layer and place on to card.

Make & Take Fri 17th April
Stamp leaves using black Versafine ink and emboss with clear powder trim and rip at one edge, use a sponge to rub around the edges, the background is a word stamp and the leaf stamp, stamped using Versamark ink. Layer on to different coloured card.

Make & Take Fri 10th April
Stamp background image all over a piece of card using a darker shade of pink than the card itself. Stamp butterfly stamp using black Versafine and emboss with clear powder, trim and layer using different colour card.

Labels:
butterflies,
friday Make and Take,
pink,
stamp of the month
Make & Take Fri 3rd April
Make & Take Fri 27th March
Make & Take Fri 20th March
The back ground is made by using crumped up cling film pressed on to Versamark ink then press lightly on to card repeat until card is full then emboss with gold powder. Stamp branch using black Versafine ink and emboss with clear powder, as soon as it is heated press foil on to the hot embosing and some will stick on to the ink. Trim and layer.

Make & Take Fri 13th March
Make & Take Fri 7th Mar
Create rectangle in the center of a piece of card using sticky notes, spray this rectangle with water so it is really wet, rub 3 colours of Adirondac inks on a piece of acetate use a paintbrush and pick up first colour and paint a rectangle in the centre of the wet puddle then paint on the next colour around the first colour, because the card is wet the colours will blend in together, repeat with the third colour, now spray with Pearl Glimmer mist and dry using heat gun, as it dries it will look pearly which you cant see in this picture. Remove sticky notes. Stamp and emboss image over the painted square, I used Pearl Ex paint palette to colour the image.

Labels:
friday Make and Take,
glimmer mists,
Penny Black
Make & Take Fri 27th February
Using a resist technique by stamping the birds with Versamark and embossing with clear powder, now rub 3 colours of Adirondack ink pads on a waterproof mat spray with Pearl Glimmer Mist then pull the bird image through the inks, trying not to mix up the ink too much. Cover the image with clean scrap paper and iron over it this will melt the embossing and give a clearer image, remove scrap paper straight away or it will get stuck on. Stamp branches at left side and layer image on different colour papers.

Labels:
bird,
friday Make and Take,
glimmer mists,
Penny Black
Subscribe to:
Posts (Atom)


